

A plein air painting demonstration:
by Gavin Glakas
Featured in the art workshops “Painting the Night” and “Glow: Creating Depth, Atmosphere, and Vibrant Sun.” Preview these painting workshops here and get your copy now.
I’ve always loved the Smithsonian Castle in Washington, D.C., and had been looking forward to painting it for years. Little did I know that it is the one building on the National Mall that is not illuminated at night. So what started as a night painting in my mind — and on my panel — became a twilight painting once the sun went down and the lights didn’t go on.
Plein Air Painting Demonstration
Step 1
My first night out, I made a quick thumbnail sketch, where I ruled out including much of the sky above the building. Then I did a pencil drawing on my panel. I wouldn’t go to this much trouble if I were painting something less complicated, but I find that if I can work out all the perspective and proportion issues first, I’m much freer when I paint. I decided at this point to chop a few inches off the left side of the panel, which I marked with a pencil line. I’d planned to stay out longer, but without lights on the building there was nothing to paint other than a big, dark smudge.


Step 2
The next morning, I toyed with a new composition in Photoshop. To switch from a night painting to one I could accomplish, in part, at twilight, I wanted to put more emphasis on the sky. By adding back that space on the left and including less road at the bottom, I felt I could put more focus on what would now be a much more interesting sky, with all of those twilight colors rather than just the dark of night. I indicated the new cutoff point of the composition on my panel, then painted over my graphite sketch to make sure I had a grasp on the linear perspective of the castle and would be ready to go that night.


Step 3
On location that evening, I started on the sky and building. Plein air painting from life means we’re essentially creating a time-lapse image of what’s in front of us, cherry-picking our favorite bits along the way. But things change so dramatically in the hour before, during, and after sunset that at a certain point, I had to “lock in” a time of day.
Will the sky be dark or light? Will the streetlights be on or off? In the end, I had to balance what was in front of me at that moment with the lighting scheme I thought would work best for the piece. I painted the building during the golden hour (looking west), the sky at sunset, and the ground at twilight and after dark, with the painting “taking place” just after sunset when the sky still has color but the streetlights are on.
I usually paint from back to front in order to overlap and build space, but since I had to paint the building in the light when I could see it clearly, I didn’t know what color the sky would be when the streetlights came on. I had to adapt and paint the sky after the building, which goes against everything that makes sense to my brain. Never mind that it would have been infinitely easier to create the graduation in the sky if I wasn’t painting around a gothic building with towers and crenellations.
When the sun went down, I pulled out my lamps (HandyBrite LED cordless work lights, which I hang from an easel perched somewhat precariously on top of the wheeled cart I use for my supplies) and painted until I ran out of steam.

Step 4
The next evening, I stuck a piece of duct tape along where I’d decided the bottom of the painting should be, then cleaned up the building on the left and painted the foliage, road, and streetlights. As you can see in the photo on the right, I changed the placement of the streetlights. They were too symmetrical and “perfect” from where I’d been standing, so I painted them where they “should be” in order to create the most dynamic composition.
Step 5
I put the painting away for a few days, then looked at it with fresh eyes. I saw immediately that it seemed distractingly incomplete; I needed more road after all. Thank goodness I hadn’t actually cut off the bottom third of my panel.
I couldn’t paint that night, so I went ahead and ventured downtown, even though it was daylight. By that point in the painting, I was comfortable with the palette and lighting, so it didn’t matter that the sun was shining; I could get what I needed from the scene.
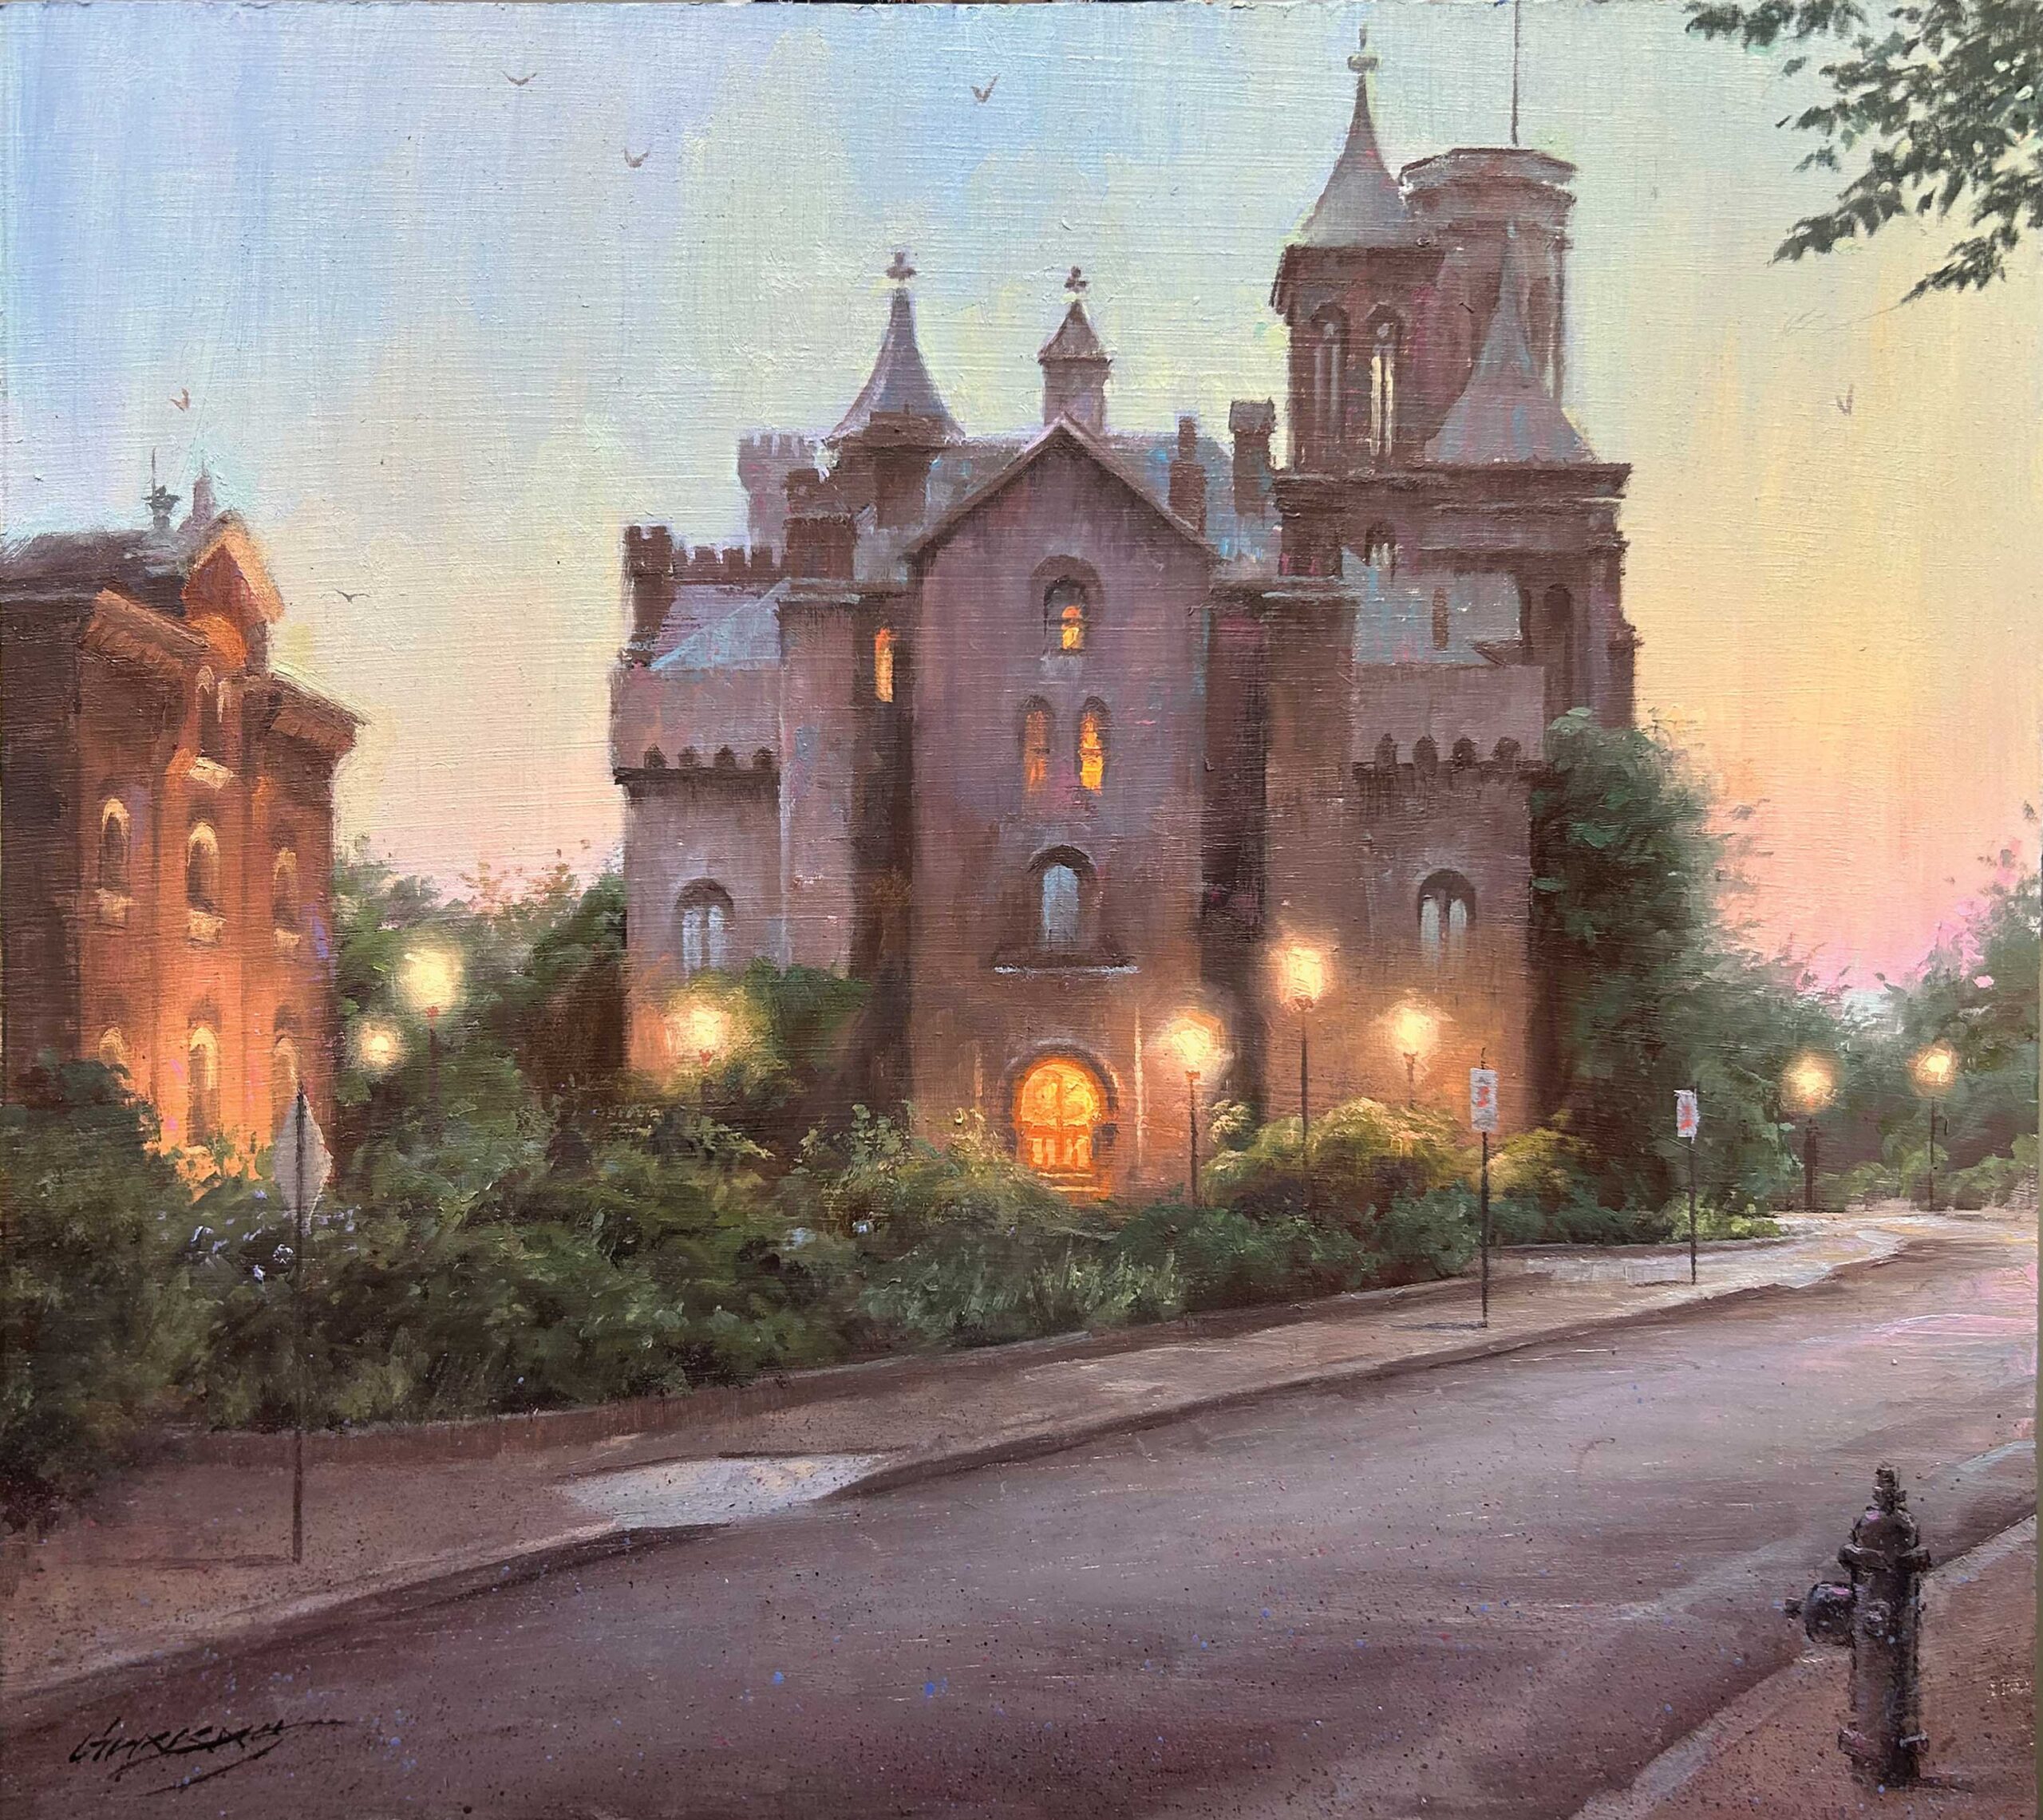
To break up the space and add bits of punctuation that would lead the viewer’s eye to the castle, I added the fire hydrant and street signs. I also added the cascading leaves in the upper right corner. In truth, I could have added these elements in my studio, but it’s so much easier, faster, and more natural for me if I can paint from life. A bit of splattered paint and a few birds in the studio later and it was ready for a signature.

The Final Painting, Plein Air and Studio
My Plein Air Painting Toolkit
Brushes: Jack Richeson & Co. filberts and flats. (My favorites are the Grey Matters synthetic flats, series 9822; they’re brilliant for fine details, razor-sharp edges, and broad scrappy areas like foliage.)
Paint: Jack Richeson & Co. — alizarin crimson, cadmium red pale, cadmium orange, cadmium yellow light, chromium green oxide, phthalo green, cerulean blue, ultramarine blue, dioxazine purple, Mars black, and titanium white
Easel: Easy L Light by Artwork Essentials. It’s light and sturdy — a perfect combination for plein air painting.
Surface: Masonite panels I buy at Home Depot and gesso with three layers
And browse more free articles here at OutdoorPainter.com


